This guide walks your team through the web portal end-to-end: signing in, submitting a scan, reading the findings, understanding the evidence behind each one, and rolling results up for review. Screenshots are from a live instance scanning OWASP/NodeGoat, a deliberately vulnerable app.
The one thing to understand first. Quaestor is not a "spray a wall of maybe-bugs" scanner. Every finding travels through a fixed chain of gates — source→sink path, exploitability proof, negative control, impact — and each gate decision is cryptographically signed. A finding that can't survive that chain is disproven or marked needs-evidence, never dressed up as a confident bug. That's what makes the output safe to route to engineers and auditors.
This page covers the web portal. For the product story see How it works; for the evidence model, see Evidence. Deeper references — the CLI, API, and operations guides — ship with your Quaestor installation.
1 · Sign in
Open your Quaestor URL. Enter your Organisation (leave blank for a single-tenant on-prem install), Email, and Password. New to Quaestor? Create an organization self-registers a tenant and its first admin.
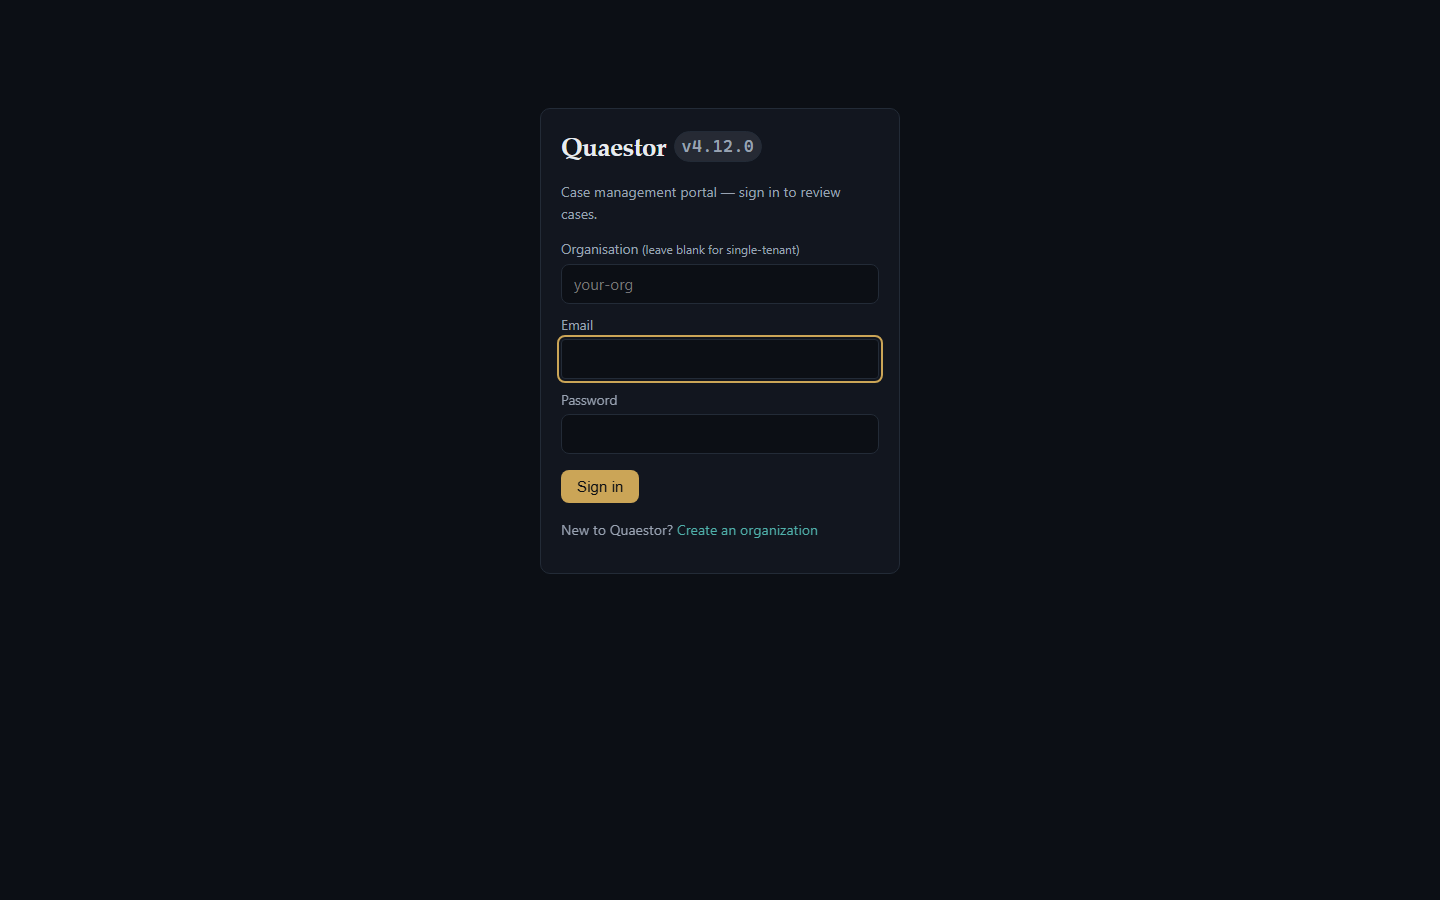
Your data is isolated to your organization — no other tenant can ever see it. Sign-in can also be wired to your identity provider via Entra ID / OIDC SSO.
Roles — who can do what
Quaestor uses four roles (least-privilege by design):
| Role | Sees / does |
|---|---|
| developer / defender | Trigger scans, work cases, answer evidence requests |
| decision_maker | Board / risk view, sign-off |
| admin | Manage members + integrations — but cannot trigger scans |
To scan, sign in as a developer (or defender). The admin role is deliberately blocked from scanning; you'll see a clear message if you try.
2 · Submit a scan
Go to Scans → New scan. Paste one repo URL, a comma/newline-separated list, or drop a file with one repo per line. Optionally set a default ref (branch/tag/SHA — leave blank to auto-detect the default branch), tick Force re-scan to bypass dedup, or Also scan related repositories to fan out into linked repos. Click Queue scans.
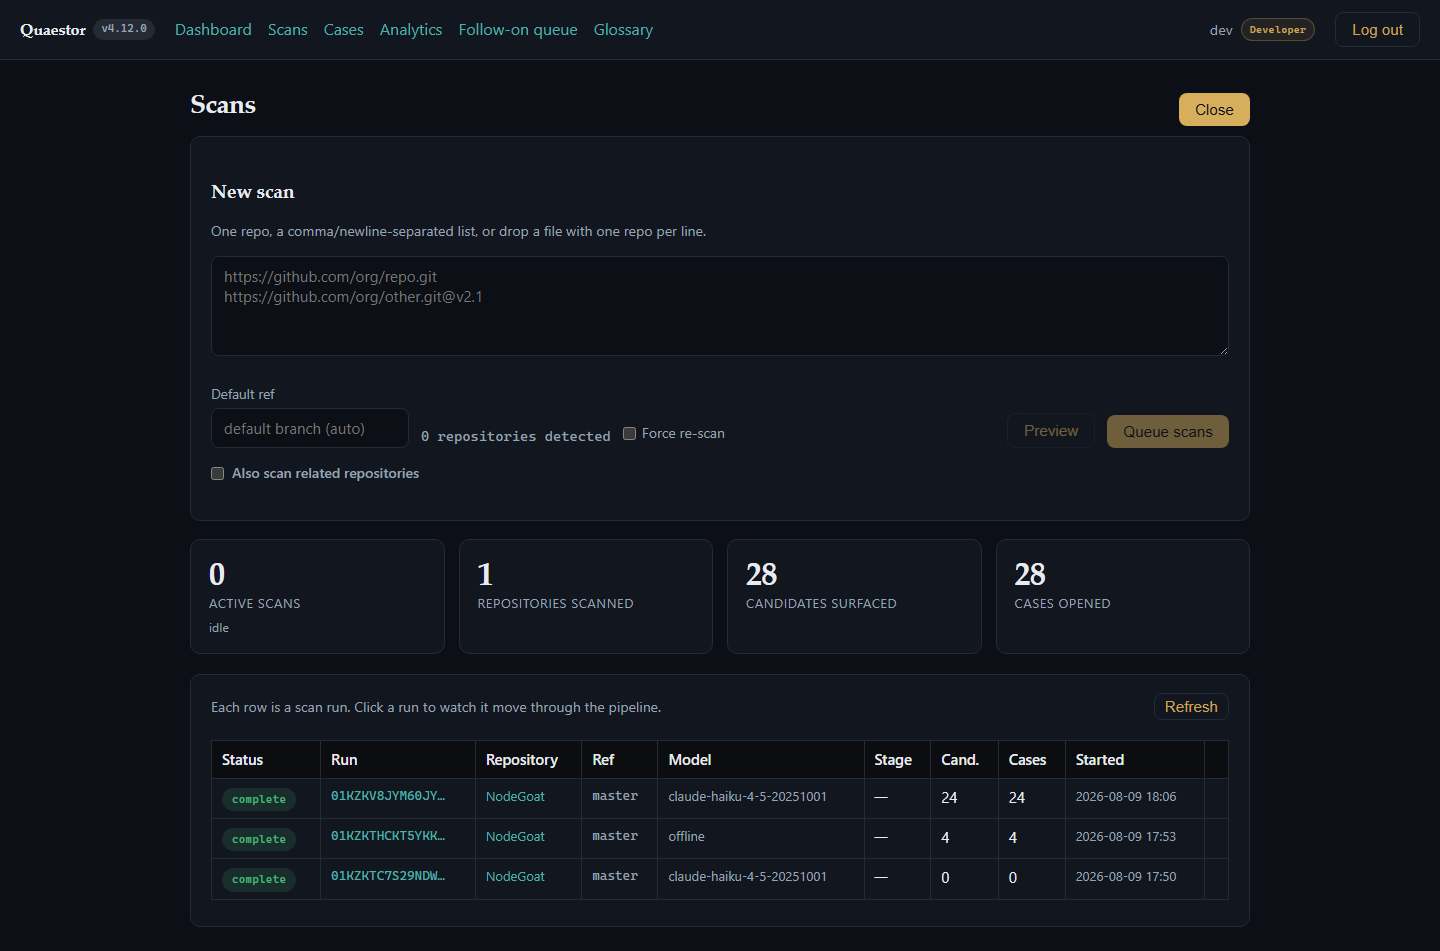
Each row in the table below the form is a scan run — click one to watch it move through the
pipeline (sanitise → map → discover → validate → report-readiness). The header cards show live totals: active
scans, repositories scanned, candidates surfaced, cases opened. The Model column records which
backend ran each scan (e.g. claude-haiku-4-5 for LLM-guided, offline for the
deterministic heuristic).
Private repos, GitHub PRs, cost. Private repos need a token; the GitHub App can trigger scans on pull requests; scans are metered per your LLM backend — use cheap models for volume.
3 · Read the findings — the Case Registry
Go to Cases. Every identified case is listed with its Severity, CVSS, Status, Title, source Repo, and the Run that produced it. Search by title/tag, filter by severity or status, and Export CSV.
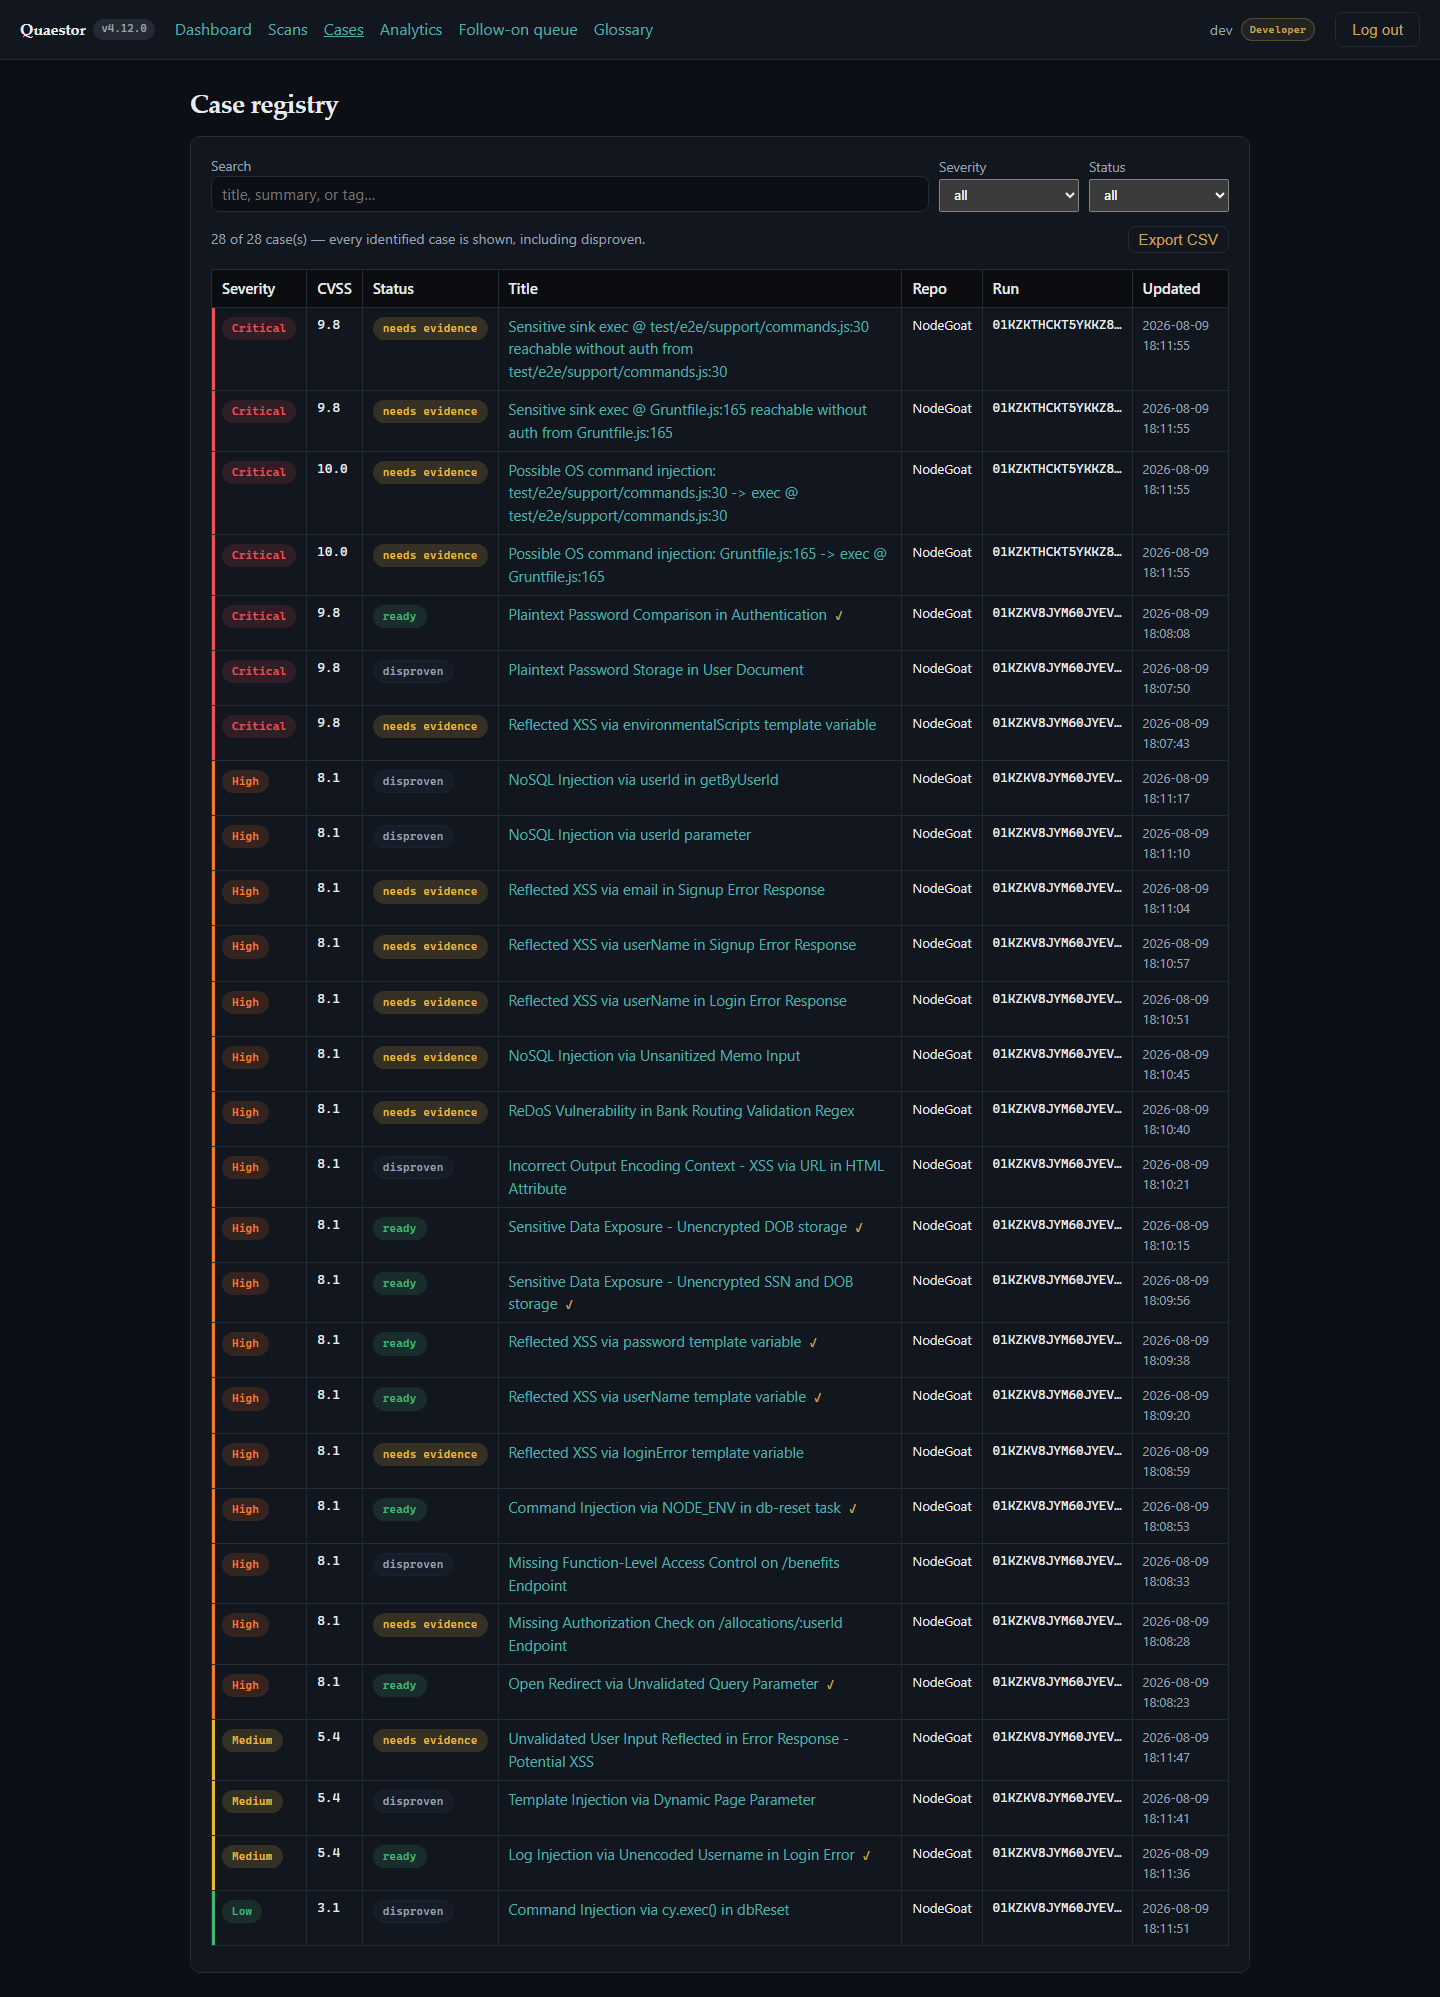
Status is the heart of it — read it before the title:
| Status | Meaning |
|---|---|
| ready | Survived the full gate chain (A–H). Report-ready, evidence complete. Fix these. |
| disproven | The negative-control / validator ruled it out — a false positive Quaestor caught for you, not noise you have to triage. |
| needs-evidence | Plausible, but Quaestor couldn't fully substantiate it on repo evidence alone — it will tell you exactly what it needs (see §5). |
In the NodeGoat run above you can see all three: confirmed criticals (plaintext password comparison, command injection), honest disprovals (a template-injection false positive), and needs-evidence items — the mix that makes the output trustworthy.
4 · Read a case — the evidence, not just the verdict
Click a case title to open it. This is where Quaestor earns trust — every claim is backed and signed.
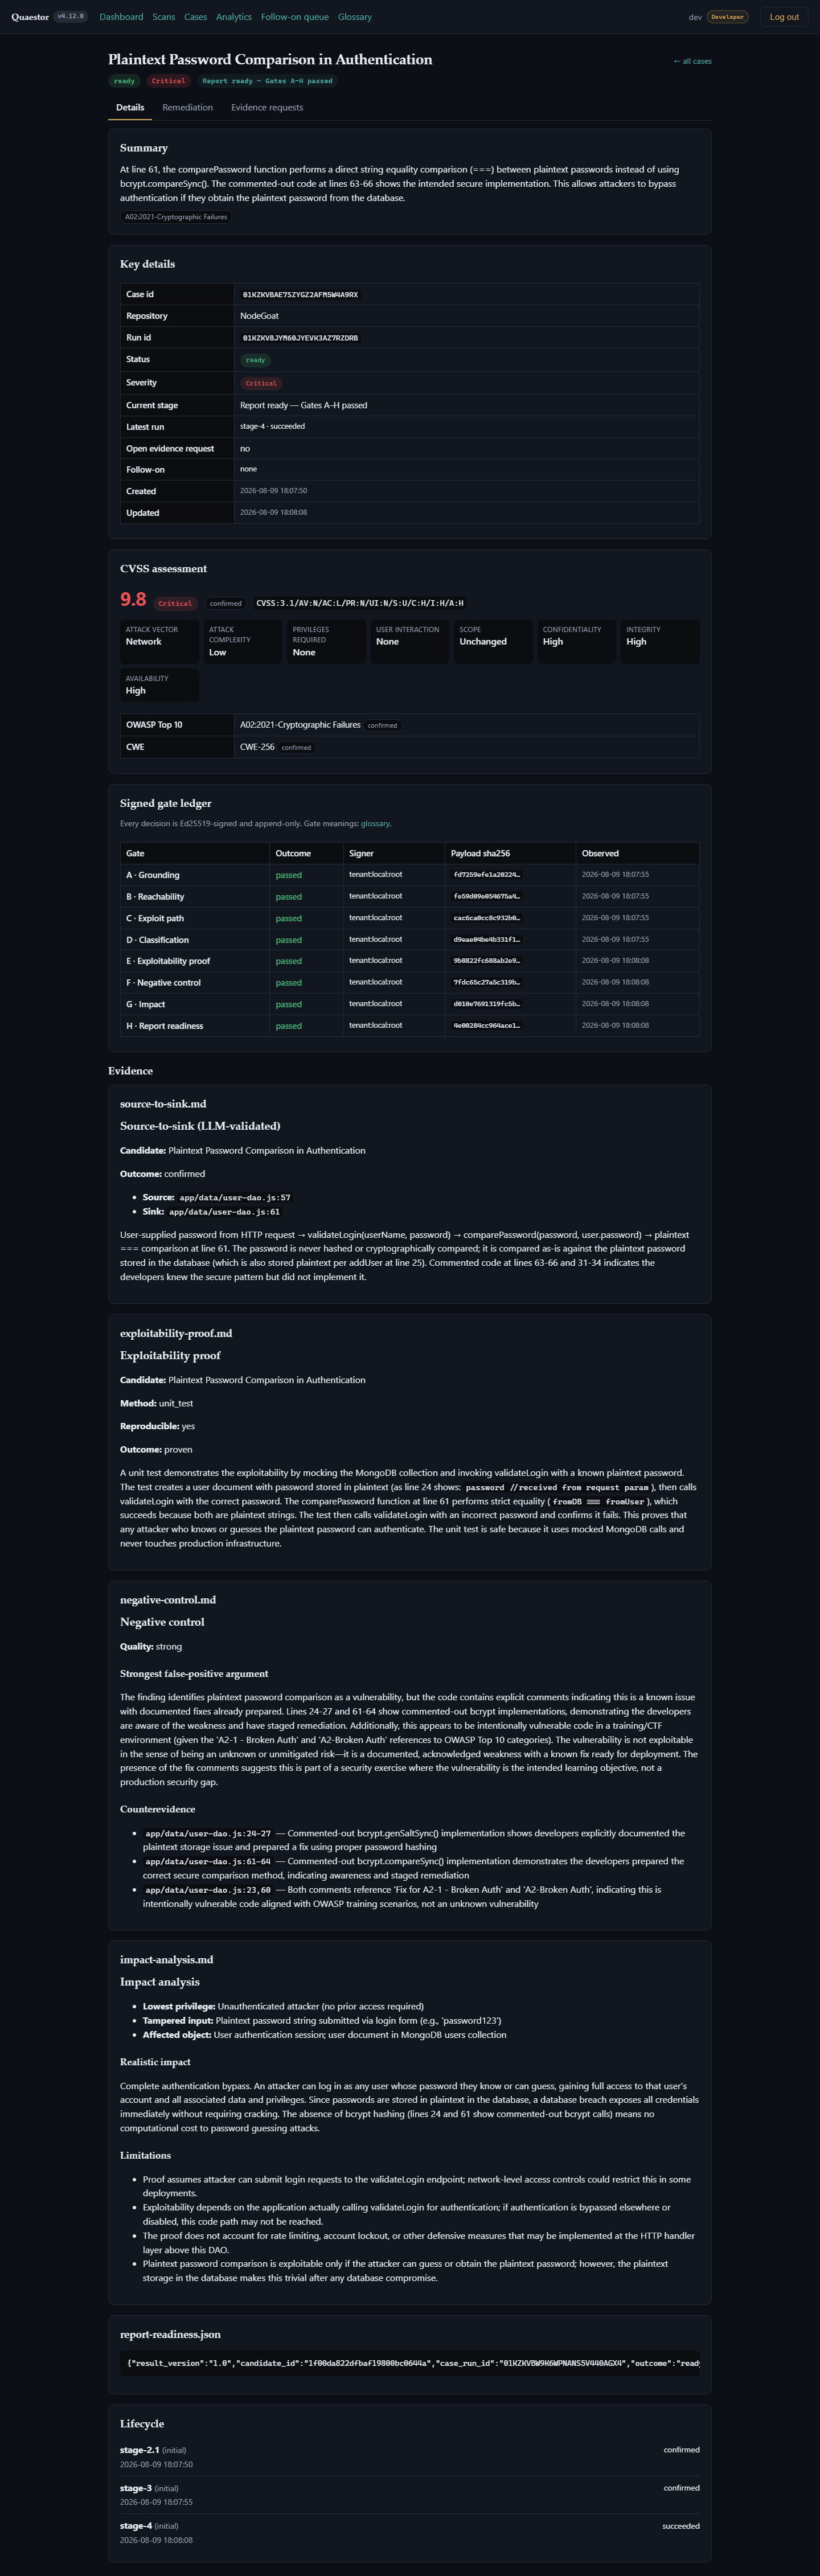
A case shows:
- Summary + classification — a plain-English summary, CVSS 3.1 (vector + score, marked confirmed vs provisional), OWASP Top-10, and CWE.
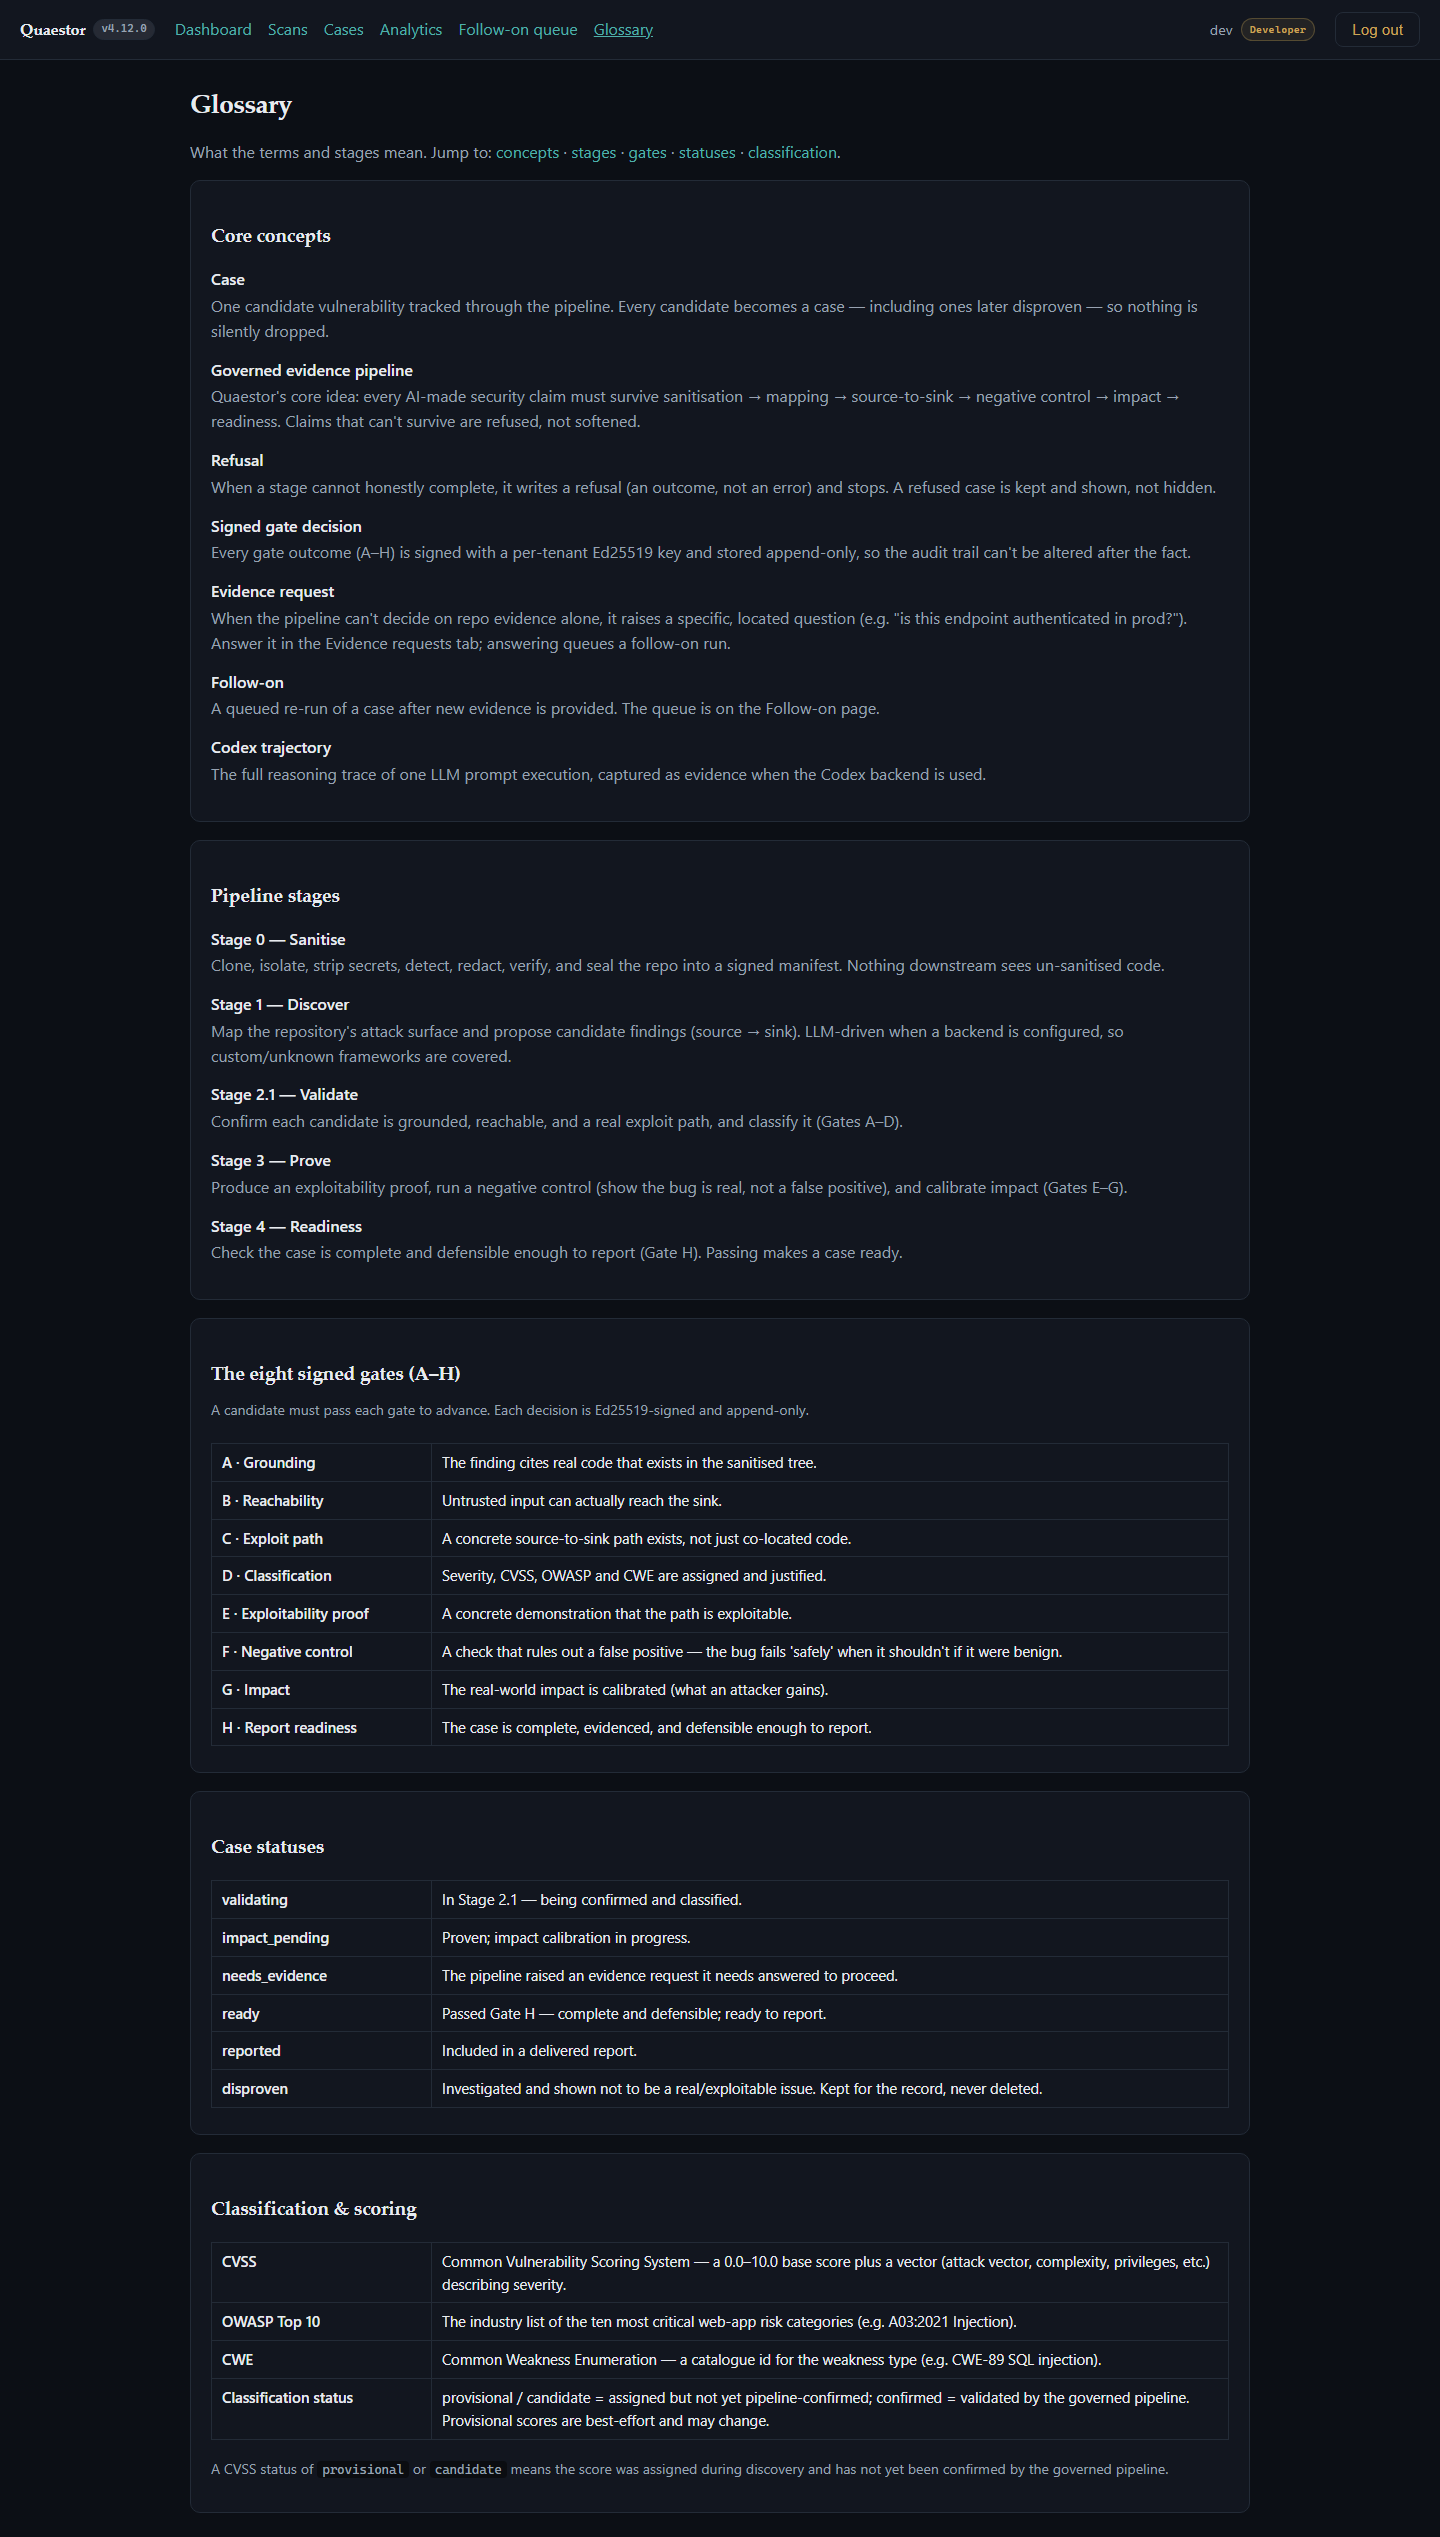
- Signed gate ledger — every gate decision (A Grounding · B Reachability · C Exploit path · D Classification · E Exploitability proof · F Negative control · G Impact · H Report readiness) with its outcome, signer, and payload SHA-256. Each is Ed25519-signed and append-only — independently verifiable offline, so an auditor can trust it without trusting the UI.
- Evidence chain (the artefacts):
- source-to-sink — where untrusted input enters and how it reaches the dangerous
operation (e.g.
user-dao.js:57 → :61), with the trace narrative. - exploitability-proof — a concrete demonstration (e.g. a unit test), marked reproducible / proven.
- negative-control — the strongest argument this is a false positive, and the counter-evidence. This is the refuse-over-overclaim mechanism you can read.
- impact-analysis — realistic impact, required privilege, and honest limitations.
- source-to-sink — where untrusted input enters and how it reaches the dangerous
operation (e.g.
- Lifecycle — the stages the case passed through (validate → prove → readiness).
This is what you hand an engineer to fix — or an auditor to trust.
5 · Answer an evidence request
When Quaestor can't substantiate a finding on repo evidence alone, it raises a specific evidence request naming what's missing (open the case's Evidence requests tab). Provide the answer in the portal and re-run; the case advances — or is honestly disproven. Requests are also deliverable by email. Nothing is confirmed on a guess.
6 · Roll it up — Analytics, Board, Follow-on
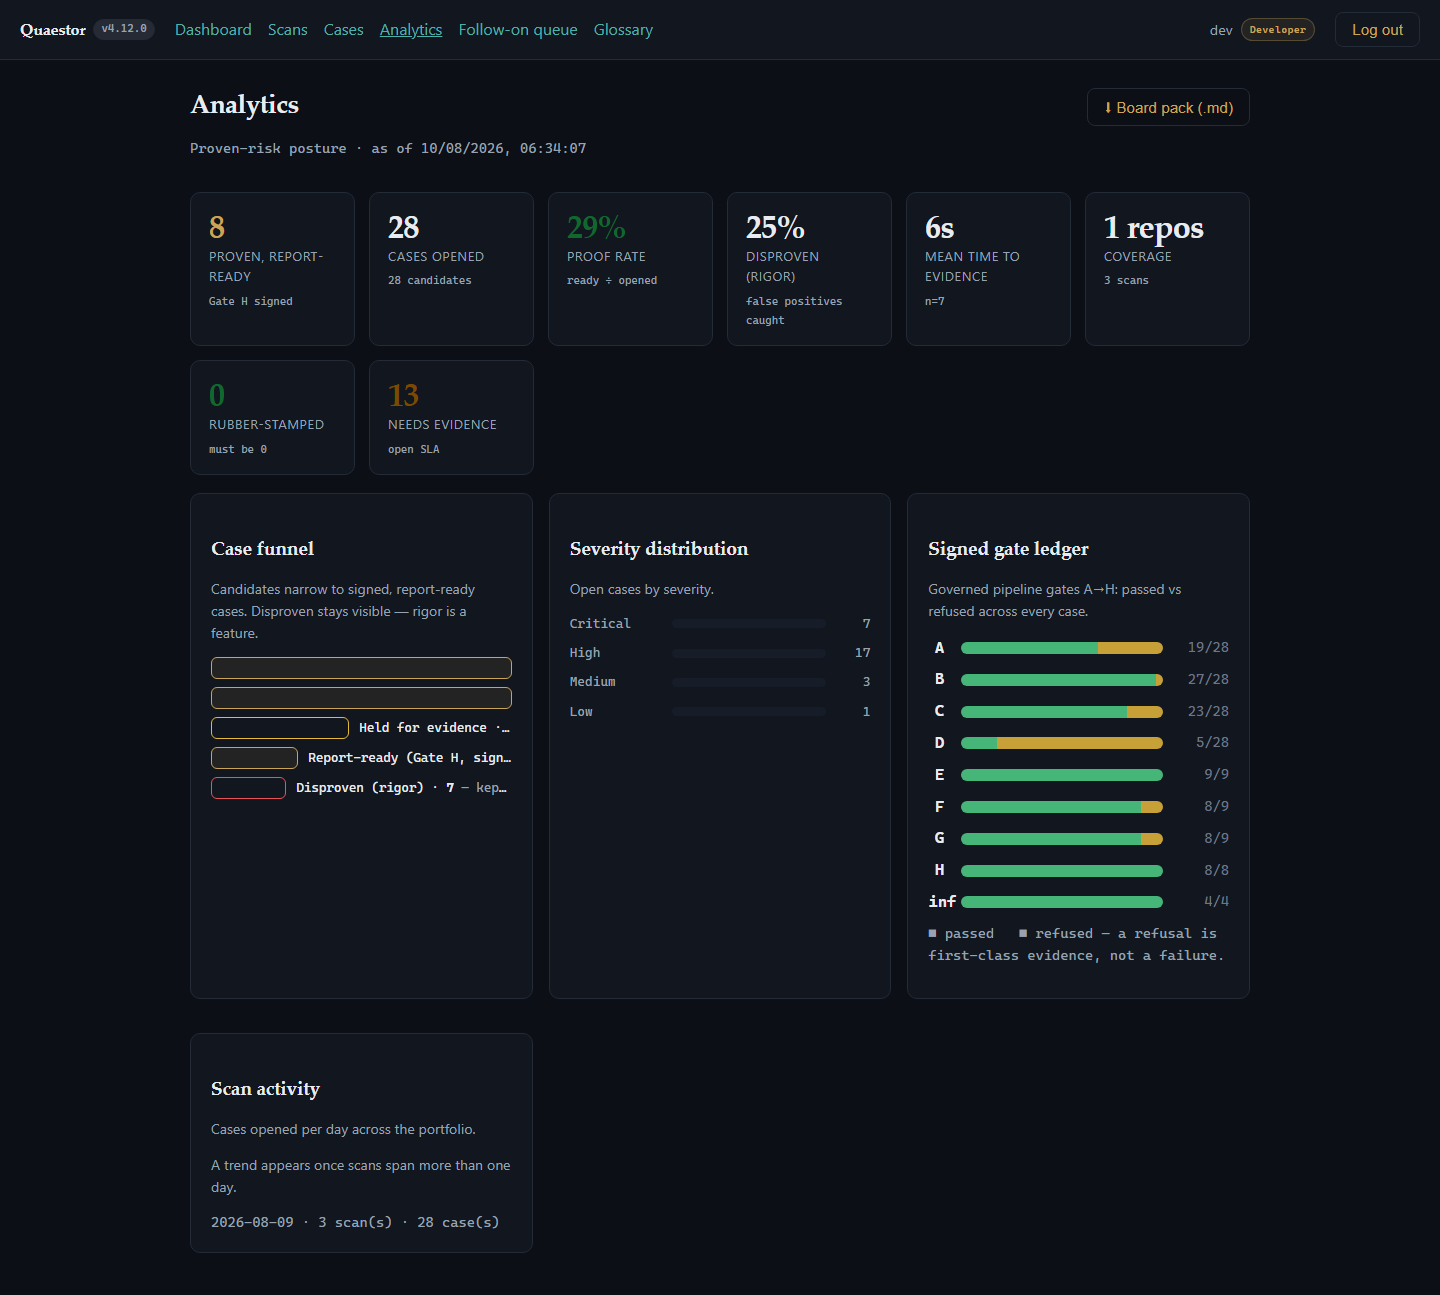
Analytics
Trends and breakdowns across your case portfolio.
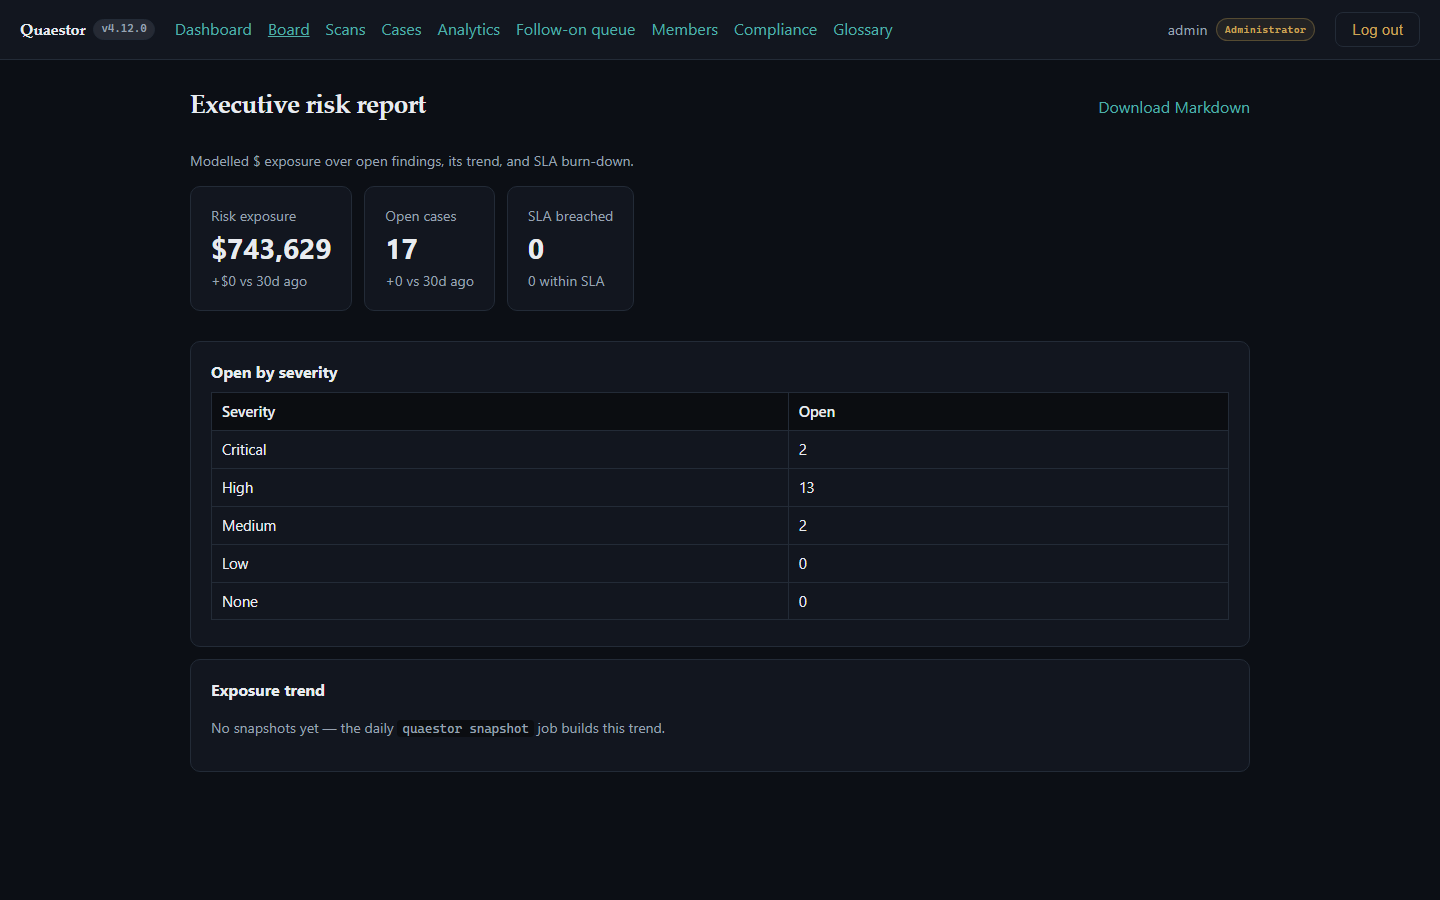
Board
The decision-maker view: current $ risk exposure, SLA burn-down, and trend (populated by the daily risk snapshot). Built for sign-off.
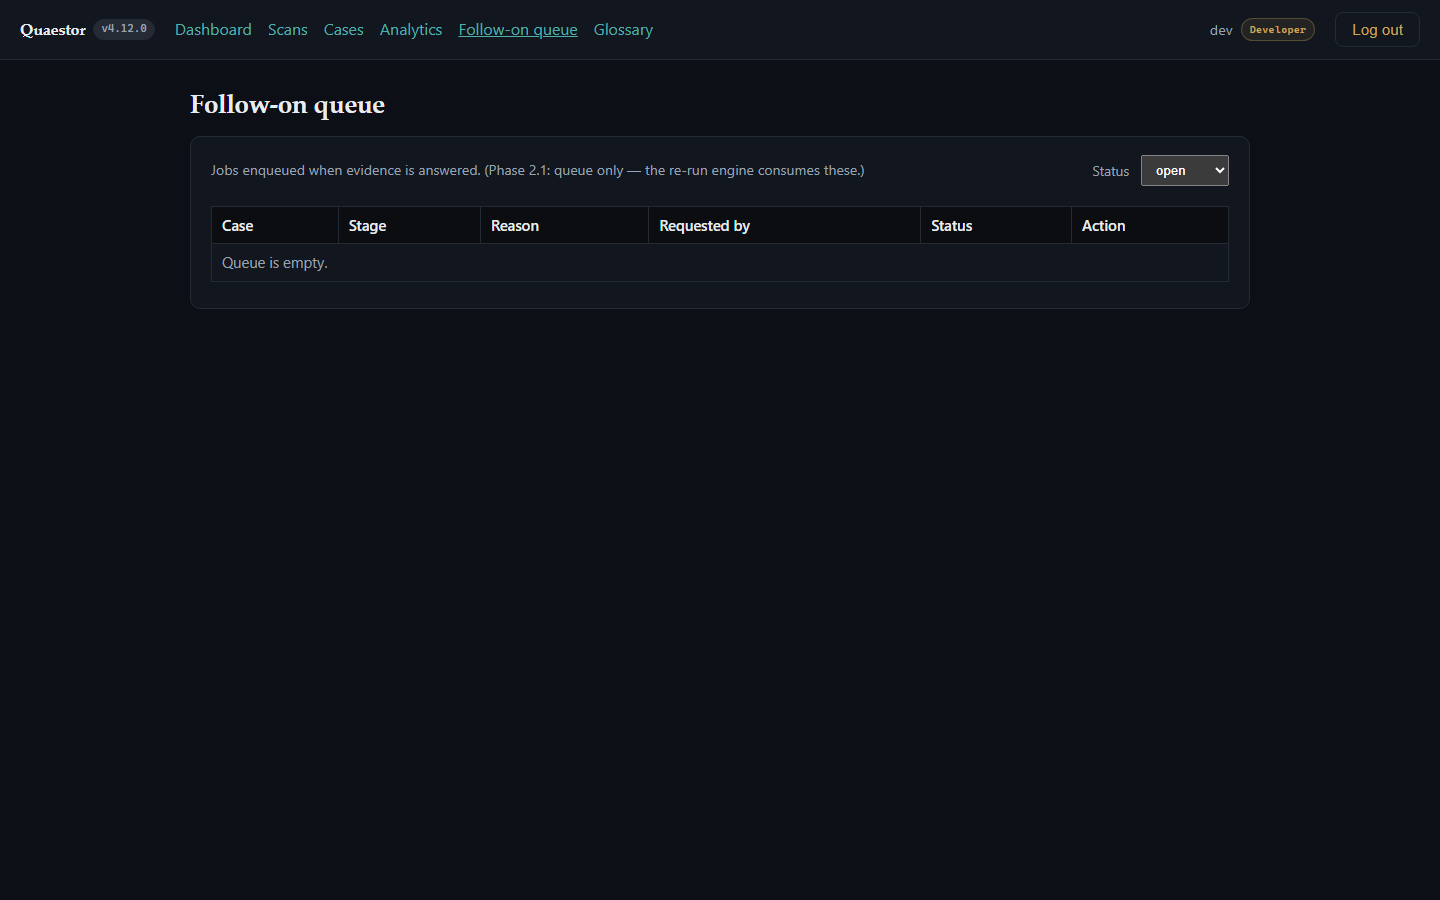
Follow-on queue
Cases queued for the next round of processing / retest.
Findings can also flow outward automatically: into your issue tracker and your SIEM via the append-only audit-log export.
7 · Compliance mapping
The Compliance view maps your findings onto frameworks (SOC 2 / ISO 27001 / PCI / DORA) to accelerate an audit. These mappings are guidance, not a certification.
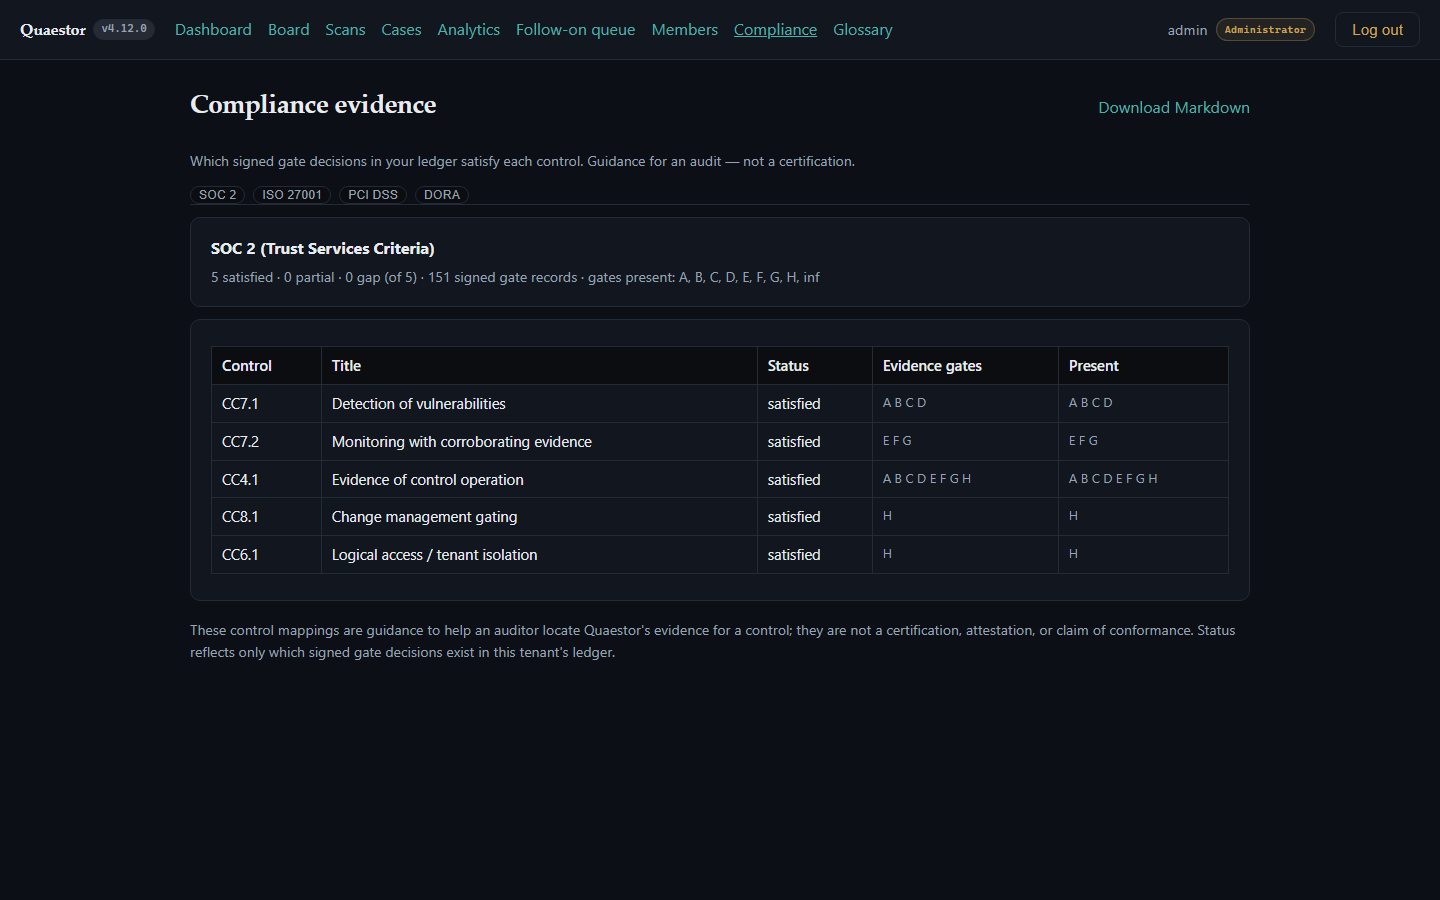
For a self-contained, offline-verifiable bundle of every signed decision, admins can pull the audit
pack (GET /api/v1/audit/pack) and re-verify it with quaestor verify-gate —
no platform, no database needed.
8 · Manage your team (admins)
Members (admin only) — invite users and assign roles (developer / defender / decision_maker / admin). Role changes take effect on next sign-in.
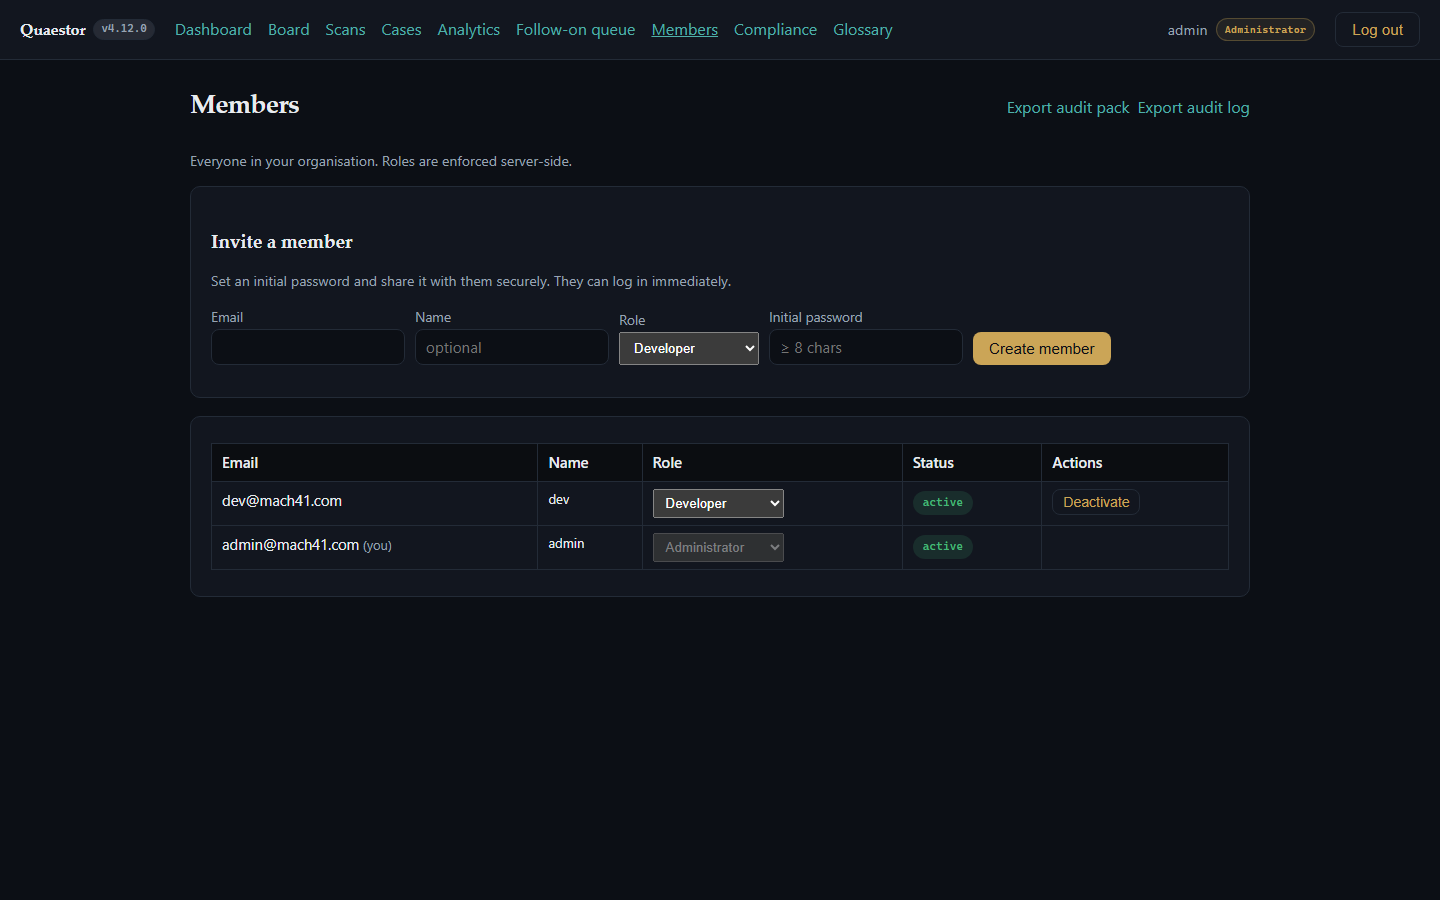
Admins also configure integrations: SSO, the GitHub App, ticketing, and SCIM user provisioning.
9 · Reference — the Glossary
Every stage, gate, and status is defined in the built-in Glossary (top nav) — a quick in-product reference for anyone reviewing cases.
10 · A 10-minute first run (checklist)
- Sign in as a developer.
- Scans → New scan → paste a repo URL → Queue scans.
- Watch the run reach complete in the scans table.
- Open Cases → sort by severity → open a ready Critical.
- Read its signed gate ledger + source-to-sink + negative-control.
- Open a disproven case — see why Quaestor ruled it out.
- Answer one needs-evidence request and re-run.
- Check the Board for the $-exposure rollup.
That's the loop: scan → governed findings → trustworthy evidence → rollup. Ready to run it on your own code? Request access.
↑ Back to top